Images that are saved in *.jpg, *.gif, *png or a host of other types can all be inserted directly into your web page. On the left is an image I got off of the USAF photo gallery site (www.af.mil/photos).
To insert an image, save it in a known directory, place your cursor where you want the image to appear in your web page, insert an <img> tag and type the path to the saved image in the src attribute:
Voila, you have an image on your page. If the image is in the same directory as your HTML file, you can simply type moh.jpg as your source (instead of http://yourDomain.org/images/moh.jpg). If the image is in a different directory, but within the same structure, you can type a relative path to the file, such as images/moh.jpg or ../images/moh.jpg or something similar. (try it).
If you want a border around your image, type:
Where n is the width of the border in pixels. No border is where n=0 (try it).
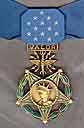
Before the computer displays anything on your page, it first must calculate how much space everything needs. It takes time, albeit not much time, for the computer to calculate the size of your image. If you tell the computer the size, it does not need to calculate it. If you right-click on the image above and read the properties, you will see it is 84px wide by 128px high. Therefore we can write:
The page now loads slightly faster. In addition, if we wanted to resize the image, we could put whatever values we wanted in width and height. Larger than normal sizes will make the image fuzzy, and if the width/height ratio is disturbed from normal, the image will be distorted (try it). If you state either the width or the height, but not the other, the computer will automatically match the normal width/height ratio (try it).
To vertically align an image, use CSS (see Lesson 12), but you may want to be familiar with the previous method used.
When you do the above, the image appears inline. If there is text before or after, the line-height will adjust to accommodate the image and the text continues to the end of the line. If you want the image to "float" on the left side of the text, and the text to "wrap around" the image, you have to add the Float Style declaration. float:left aligns the image to the left of the screen while the text wraps around it to the right (as was done with the first image at the top of this page), and the inverse is true for float:right. Once again, the previous method exists, but CSS is preferred (try it).
<p>All the text is then written normally, and if it is long enough, it will wrap around the image until it reaches the bottom of the image, then it will continue on the next line as if no image appeared at all.</p>
The Margin Style declaration adds some space around the image (otherwise the text would butt against the side) (try it). Using all the attributes above, this would now appear:
All the text is then written normally, and if it is long enough, it will wrap around the image until it reaches the bottom of the image, then it will continue on the next line as if no image appeared at all.
To display images on the same line with text wrapping around both, do as follows:
<img src="images/moh.jpg" border="0" width="84" height="128" style="float:right; padding:5px">
<p style="text-align:justify">All the text is then written normally, and if it is long enough, it will wrap around the image until it reaches the bottom of the image, then it will continue on the next line as if no image appeared at all. Imetit in sposipit nepevas. Tiplon in pesemes oniprat. Vusc iripha uraquadanis, at esiscr emitrore ilistas. Itrih man, fosc socon scho osciscra noquor. </p>
And you will get:
All the text is then written normally, and if it is long enough, it will wrap around the image until it reaches the bottom of the image, then it will continue on the next line as if no image appeared at all. Imetit in sposipit nepevas. Tiplon in pesemes oniprat. Vusc iripha uraquadanis, at esiscr emitrore ilistas. Itrih man, fosc socon scho osciscra noquor.
If your text is not long enough to reach the bottom of the image(s), but you want the rest of the text to clear below the image(s), use the Clear Style declaration. You can clear:left, clear:right or clear:both (try it).
<img src="images/moh.jpg" border="0" width="84" height="128" style="float:right; padding:5px">
<p style="text-align:justify">All the text is then written normally, and if it is long enough, it will wrap around the image until it reaches the bottom of the image, then it will continue on the next line as if no image appeared at all.</p>
<p style="clear:both">This text clears both images.</p>
And you will get:
All the text is then written normally, and if it is long enough, it will wrap around the image until it reaches the bottom of the image, then it will continue on the next line as if no image appeared at all.
This text clears both images.
Do the following:
- Save any image (or two or three) in the same directory as your sample2.htm file.
- Find an image you like off the USAF photo gallery site (www.af.mil/photos).
- Right-click on the image and choose "Save Picture As"
- Display the image anywhere on sample2.htm.
- Write a little bit of text in paragraphs, headers or both, and wrap the text around the right side of the image (float the image on the left side).
- By changing only the Style declaration, make the text wrap around the left side of the image (float the image on the right side).
- Add some more text, but make it appear below the bottom of the image.
- In this lesson, we learned about these HTML tags:
- <img>
- and these Style properties:
- float and
clear
For more information on the topics of this Lesson, see this site.
